Preserving Series: Water Bath Canning: Applesauce Revisited

I was all set out to purchase this wonderful, full-size, great deal, water-bath canner yesterday morning from Kings, a great discount store that I just stumbled upon recently. You know I’m all about discounts right?! But as I picked it up to carry it to the register (imagine a very pregnant lady trying to carry a pot as round as her belly as well as a purse. It was hilarious!) I noticed that it said not for use on glass cooktops. Well life being what it is, it just so happens that where we live now has a glass cook top. So, I did a little reasearch and found out that they can indeed break glass cooktops, as well as their being other hiccups including sensors going haywire and so on. So not wanting to break the stove, I decided to go the route that I went last year. Another time I will purchase a wonderful huge pot to make canning go that much faster!

For now I am just using a large stockpot with a spaghetti insert to can my items, but there is also something new out there to new canners called the Ball Home Canning Discovery Kit that you can purchase for just over ten dollars from Amazon. You just need to make sure that it fits in your own home stockpot and this is a great tool for Canning Beginners! The image below is from Amazon.com.

Anyways, on to the Applesauce! Let me just tell you though that yesterday was truly a canning experience!

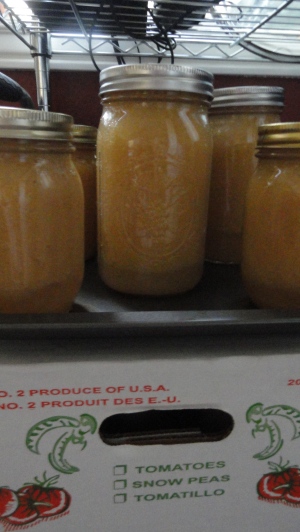
We canned all the jars on the baking sheet and the full box just below!

11 hours, 4 full batches, and a ton of canned Applesauce later I fell into bed exhausted, but happy. I sent my awesome hubby to bed about an hour earlier, because he had to wake up early for work. Hopefully between my applesauce loving husband, and our dear sweet little man getting closer to making his appearance each day (EEK!!!), we will have enough applesauce to last us until next canning season. I’m certainly crossing my fingers! I used the canning recipe that I talked about here, 8 months ago. I also did some minor updates to the recipe from things that seemed to work easier for us this time around!

For us this was also a really great deal, because we were able to get the apples for free! Our landlords (My hubby’s Aunt and Uncle), have apple trees that they were not using, and they said that we could have as much as we wanted. So we paid for the price of the sugar, lemon juice, and the canning lids. That was a steal!! We are super excited and thankful to them! And as payment we are giving them some Applesauce! Have you come across any great deals like this?

I hope that you are getting everything all ready for fall!

As always From my Family to Yours…

Preserving Series: Simple Freezer Jam: Peach Raspberry-Blackberry Jam

We love jam! And the great thing about this Jam recipe is that it super easy and can be accomplished in a short period of time! My hubby and I took a small chunk of our afternoon and whipped it out together.

If you are new to canning, freezer jam is your best friend! It is not hard at all and it takes about half of the time of a cooked method. But it yields a delicious fresh fruit taste! It is great this time of year with fresh farmers market produce! And the great thing is that if you want to make any other Jam/Jelly recipes, the Sure-Jell brand pectin has a whole set of recipes that come with the box!!

Peach Raspberry-Blackberry Jam

I apologize that I did not photograph every step, that is something that I am working on!

UPDATE: Photos loaded on 10/2/2012.

1 lb Peaches

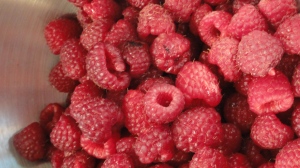
1 pint (2 cups) Raspberries

1 pint (2 cups) Blackberries

3 c Sugar

1 box Sure-Jell  For Less or No Sugar Needed Recipes Fruit Pectin

1 c Water

yields: about 6 cups

1. Wash and rinse containers and tight-fitting lids for jam. Use 1 to 2 cup size containers.

2. Crush the raspberries and blackberries together. You can crush one cup at a time, with a potato masher.

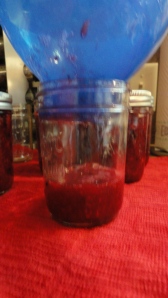
3. Peel, pit, and finely chop the peaches. We then threw the peaches into the food processor to get them to be almost like a chunky sauce consistency. Before we combined the peaches and the crushed raspberries and blackberries, we took about half of the raspberries and blackberry mixture and put it in a strainer to lessen the amount of seeds in the jam.

4. Measure the exact amount of sugar into a large saucepan. Stir in 1 box Sure-Jell For Less or No Sugar Needed Recipes Fruit Pectin until throughly mixed. Stir in 1 cup water and bring the mixture to boil over medium-high heat, stirring constantly. Boil and sit for one minute, then remove from the heat.

5. Stir the fruit mixture quickly into the hot pectin-sugar mixture. Stir for one minute or until thoroughly mixed.

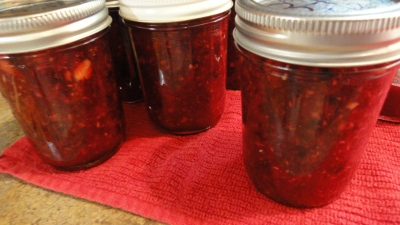
6. Pour into prepared containers, leaving 1/2 inch head space for expansion during freezing. Cover and let sit at room temperature for 24 hours until set.

7. Refrigerate up to 3 weeks, or freeze for up to one year. Allow to thaw in the refrigerator.

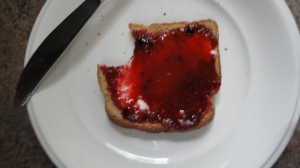
This is yummy on toasted bread, and I’m sure in PB and J’s as well! Enjoy!

From my Family to yours…

Preserving Series: Water Bath Canning: Applesauce

This week has been loaded to the brim with so many things to do and fix. At the end of last week our water heater went out, and we have been working with management in our apartment to try to get the problem solved, (it’s been tricky especially when things were happening that management insisted was NEVER supposed to happen, turns out it does happen, only rarely). Today they are coming to “fix” the problem, hopefully this is it because, it turns out it’s really hard not having hot water. Then we set a goal to finally finish all of our Thank You cards from our wedding, I know it’s been a while, but better late than never right? Plus I’ve had several meetings across, the board, so I am sorry this post is coming to you a little later than intended. But you may remember me mentioning that I was going to make applesauce, with those beautiful apples that I got from the BB a couple of weeks ago, here. Well we did! And it was a long day of canning, that my sweet husband helped me with, but we are now stocked up on applesauce for the next little bit. Let me also say that the only official canning equipment that I have jar grabber (proper name, I know…) and a plastic tool that helps get the air out of the jars and also helps measure the space from the filling to the top of the jar, otherwise known as the head space. I someday want to get a pressure cooker but that will be a little ways away. For now, I only do water bath canning and I use a large pot with my spaghetti insert, I’m hoping to get a smaller round cooling rack to stick on the bottom of my pot, but for now this works just fine.  This is a recipe that I found on the Ball Canning Website, but it is adjusted it to our tastes, I hope that you enjoy it as well!

Applesauce*

Updated September 27, 2012

12 lbs Apples, peeled, cored, quartered, and treated to prevent browning** (you will need about 36 medium apples***)

Water

Sugar, optional, to taste

4 Tbsp Lemon Juice

Cinnamon, optional, to taste

8 (16 oz) pint glass preserving jars with lids and bands

1. Prepare jars, lids, and canner as instructed here.

2. In batches, combine the apples with enough water to prevent sticking in a large sauce pot. Bring to boil over medium heat. Reduce the heat and boil gently, stirring occasionally, for 5 to 20 minutes, until the apples are tender (time will depend on the variety of apple and it’s maturity). Remove the apples from water and let the apples cool slightly,about five minutes, and reserve the water. Keep the water/apple juice mixture heating, and as it heats it will continue to reduce down, and thicken.

3. Transfer apples, in batches, to a food mill or food processor fitted with a metal blade or use an immersion blender. Either way make sure you add some of the water/apple juice mixture, that you softened the apples in, add just enough until the applesauce is saucy and smooth enough for you, this will also help the food processor and mill to produce fine even sauce. Then puree until the mixture is smooth.

4. Return the apple puree to a new sauce pot, if doing in batches and add in the sugar (we used around 2 cups) if using, lemon juice (required), and cinnamon, if using (start with a very small amount, a little goes a long way). Now taste the applesauce at this point. Do you like it? Does it need something? More cinnamon, more sugar? Now is the time to add it. Then bring it to a boil over medium-high heat, stirring frequently to prevent sticking. Make sure the lid to the pot is nearby and that you are outfitted properly for the task, for safety reasons. (This can be tricky because from my experience applesauce doesn’t boil, it explodes, so be careful!)

5. Ladle hot applesauce into hot jars leaving 1/2-inch head space.

6. Process the jars in a boiling water canner for 20 minutes, adjusting for altitude. Remove the jars and cool. Check the lids for seal after 24 hours, meaning the lid should not flex up and down when the center is pressed.

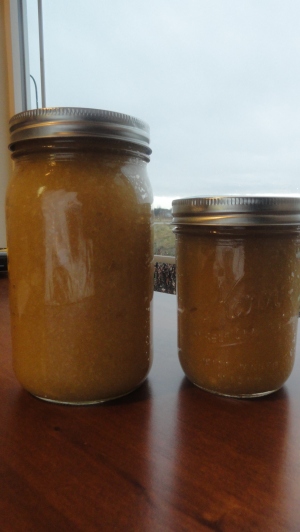
*This recipe makes about 8 (16 oz) pints. You see a quart in the picture above because I used more apples and didn’t have enough of the pint jars.

**To prevent browning, place apples in a mixture of 1/4 c lemon juice and 4 cups of water.

***You can use any kind of apples you want, but a mixture of both sweet and tart creates a unique flavor, worth trying.

This is delicious applesauce, and we hope that you enjoy it as much as we do, and that your week was a little less crazy then ours was.

From my family to yours…

Happy Canning!